Equipment to create virtual field trips
Introduction
When it comes to equipment to create a virtual field trip, there is no one-size-fits-all solution. This section focuses on recommendations that are appropriate for most people, rather than higher-end solutions.
Specific items are suggested in good faith, including equipment details and specifications. It is your responsibility to check that any equipment and software you purchase suits your requirements. Also, functionality and prices can change over time.
We will add to the content of this page over time.
Table of Contents
Equipment for 360° images (not video)
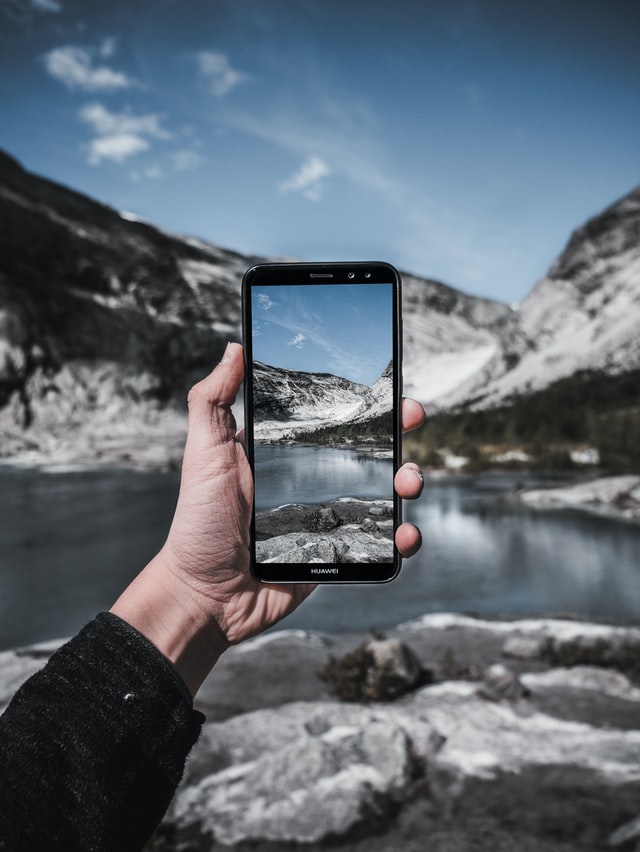
Smartphone
We feel that, for most people, a modern smartphone with a good camera is one of the best ways to create panospheres in the field. It combines ease of use with image quality often surpassing that produced by consumer-grade all-in-one 360° cameras (e.g., Insta360 OneX2, GoPro Max).
Most phones (Android and iOS) have camera apps that lead you step-by-step through the process of creating a panosphere. You may instead prefer to download a dedicated app for this purpose, such as Google Street View.
Your app will guide you through the process of taking overlapping photos of your surroundings. You should aim to keep your smartphone at the same point in 3D space, as if on an imaginary tripod, as it rotates 360°. This is to avoid visible stitching seams (due to parallax errors), although whether these will really bother you is another matter.
Once you have taken the overlapping photos, your smartphone will automatically stitch them together to produce the final image. This is an equirectangular image, with a 2:1 aspect ratio, but your smartphone and/or cloud photo service (e.g., Google Photos) will recognise that it is a panosphere. Otherwise, you will need software to allow you to view it as a panosphere (rather than the flat, rectangular image that it is).
Compared to using an all-in-one 360° camera, the process of creating panospheres in the field using a smartphone takes slightly longer. However, there are time savings elsewhere. For example, an all-in-one 360° camera requires more time for setup on a tripod and to connect to a smartphone for remote control (assuming you do not want to be standing close to the camera when the picture is taken).
Also, panospheres created using a smartphone will not include you, because you are always on the other side of the lens.
Pros
- No additional purchase required [for those who already have a smartphone with a good camera]
- Ease of use [overall]
- Image quality [in our experience, superior to most consumer-grade all-in-one 360° cameras]
- Lightweight [no tripod required]
- Georeferenced [GPS must be enabled on your phone]
Cons
- Requires practice to minimise/avoid stitching errors
- Not suitable for scenes with movement
- You may not want to use your own device
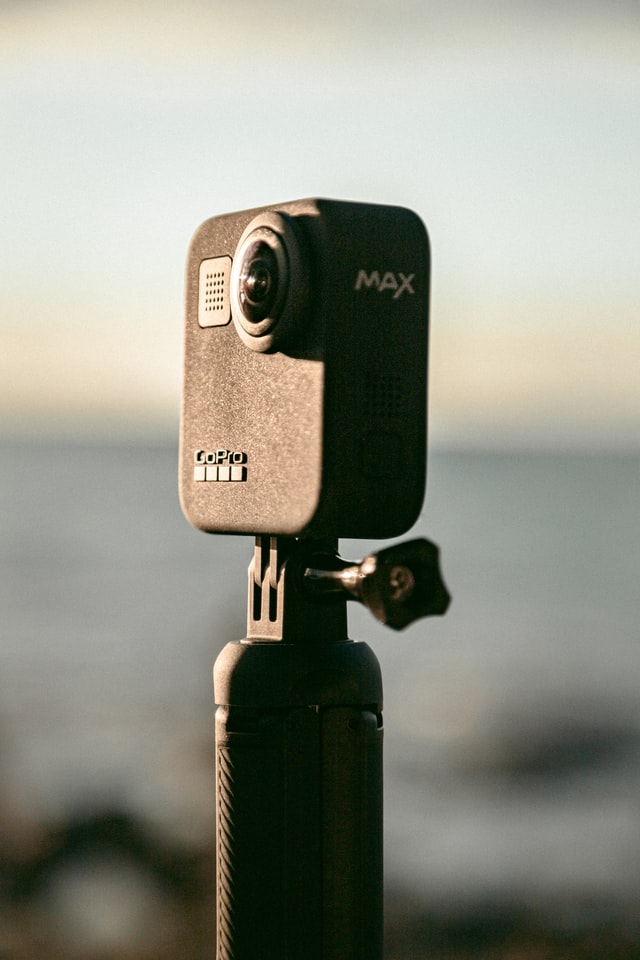
GoPro Max
This is another good option. In addition to panospheres, the GoPro Max (and other all-in-one 360° cameras) is also able to capture immersive video and audio. Compared to panospheres produced by the latest smartphone cameras, however, image resolution and quality may not be so good. This is unlikely to be noticeable on smaller screens.
The GoPro Max has two very wide-angle lenses (180° fisheye) that allow it to capture a 360° view. Unlike when using a smartphone to create a panosphere, the pictures are taken instantly. This is better for dynamic scenes (e.g., waves on a beach), which can result in stitching errors in panospheres created using smartphones – due to the time difference between successive photos.
You can hold a GoPro Max (or similar) above your head, which is a quick and easy way to take multiple panospheres in the field. However, you may prefer to mount it on a tripod. For the Max, you will need to buy a separate attachment to allow you to connect the device to the tripod.
The tripod itself should have a small footprint, which renders it more or less invisible in the final output. These are really just monopods with small feet to provide some stability. The trade-off here is that these tripods are much less stable than standard ones, especially in windy conditions or on uneven terrain. You will usually have the option to buy weights to attach to the base of these tripods, which we would recommend.
You should be able to connect your smartphone to your 360° camera remotely (using WiFi or Bluetooth), which allows you to preview and capture shots. Assuming there is a tree or boulder to hide behind, this allows you to remain out of shot.
In our experience, establishing a connection between a smartphone and our 360° camera can sometimes be instantaneous, but more typically takes several minutes. This may be an issue specific to the smartphone we used. Nevertheless, this adds to the time involved with setup.
The two images are stitched together in the camera. With only two images, stitching errors are less likely to be visible (compared to panospheres created on a smartphone, which involves the stitching of multiple images). Unfortunately, there is sometimes a lack of image definition (blurriness) at the joins, presumably due to the optical limitations of the fisheye lenses.
The GoPro Max outputs a single equirectangular image in JPEG format. The in-camera processing creates a slightly more vibrant image than the default output from the Insta360 OneX2 and even the much more expensive Ricoh Z1.
For those interested in processing RAW files in photo editing software, both the OneX2 and the Z1 provide this option, unlike the take-it-or-leave-it simplicity of the Max. On paper, editing RAW files provides much more flexibility when it comes to image enhancement. In our experience, the benefits were subtle and not worth the extra steps involved.
Despite the many benefits offered by the GoPro Max (and similar), the resolution and image quality of its output were noticeably inferior to the panospheres created using our smartphone (a Pixel 6). It is worth noting, though, that this comparison was made using a large monitor (32 inches), and the differences will be less obvious on small screens (e.g., laptops).
The biggest advantage that the GoPro Max has over a smartphone is that it can also be used to capture 360° video, although the same limitations about resolution and quality apply here. Even if you do not use the video, you can still use the audio recordings.
Finally, the GoPro Max is now 2 years’ old. There are hints of a replacement towards the end of this year or into next. Unless you need to buy one now, it may make sense to hold off buying one.
Pros
- Relatively inexpensive
- Ease of use
- Better than a smartphone for scenes with movement (e.g., moving vehicles, waves)
- Records 360° video as well as stills
- Georeferenced images
Cons
- Image resolution and quality not as good as panospheres created using a Pixel 6 (and similar devices). Blurriness may be noticeable near image seams.
- No RAW file output
Also consider
There are many other 360° cameras on the market, but we only have experience of the Insta360 OneX2 and the Ricoh Z1. Both are better than the Max on paper, with the Z1 noticeably so for 360° stills (better lenses, better sensor).
We feel these are only worth considering if you have the time and inclination to work with RAW files, and are happy with the extra step of stitching two fisheye images together on your computer to create a final equirectangular image.
In our opinion, a good quality smartphone camera is still the better option if you want a step up in image quality from the Max.
Top tips for using the GoPro Max
- The small image sensor produces best results in well-lit conditions. If you can, avoid using in cloudy, dark days.
- Images usually benefit from slight adjustments to exposure, contrast, and saturation in your favourite image editor (which could be cloud-based, such as Google Photos).
- The resolution (detail) limitations can be partly offset by taking photos closer to features of interest. You can supplement these with standard photos taken with a smartphone camera
Digital SLR or mirrorless camera + suitable lens + panoramic head + tripod
For users with the time, money, aptitude, and interest, this ‘full-blown’ approach will yield the best quality images – both in terms of resolution and quality. Depending on the combination of camera and lens, the time spent in the field at each panosphere stop is not necessarily that much longer than it takes to set up and use a GoPro Max. The big difference occurs back at the computer, where there is—or can be—a considerable amount of time spent processing and stitching the files. Additional software is required.
Do you need this level of image resolution and quality? For virtual field trips that are mostly concerned with supporting in-person fieldwork, the answer may well be no. Indeed, the same can probably be said for the virtual field trips we provided as part of this project! Our decision to opt for a slightly higher-end solution reflects our personal preference and existing skill set. If we had not already had this knowledge and experience, we would probably have used a smartphone instead.
Details of the kit we used is provided elsewhere, along with a brief overview of the steps involved in taking the photos and post-processing.
If you are looking to go down this route, you will need the following:
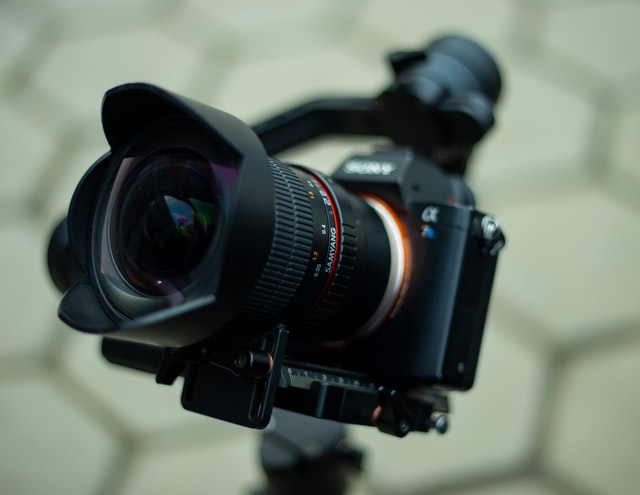
A camera body plus a suitable lens.
We used a Canon 5DSR body with a Sigma 15mm fisheye lens. The combination of the 50-megapixel sensor plus the lens provides a moderately high-resolution final image, using just 6 overlapping horizontal photos (taken in portrait orientation) and one looking straight up. This also needs an image looking straight down to complete it, but we found it easier not to bother and instead fill in the small hole using Photoshop.
The field of view provided by the lens and sensor combination will vary. We could have used our Sigma 8mm fisheye lens instead of the 15mm one, which would have meant fewer images to take and stitch together. The downside is a lower resolution final image. It would still be better than any all-in-one 360° camera, though, and may produce better results in scenes with a lot of movement in them.
Conversely, we could have used gone with a narrower field of view, which would have produced much higher resolution final images but at the cost of more time spent both in the field and processing images on the computer. And with more photos comes more opportunies for stitching errors.
When deciding which camera and lens to purchase, it is also worth giving some consideration to the combined weight of the kit.
A panoramic head plus tripod.
The panoramic head, which sits on the tripod, allows you to rotate the camera around the nodal (no parallax) point, which is important to avoid stitching errors. Well-known manufacturers include Nodal Ninja. This is essential equipment. Setting it up for your particular combination of camera body and lens can involve a bit of trial and error.
Pros
- Best image quality and resolution
- Flexibility to combine the right camera body and lens to suit your requirements
Cons
- Expensive
- Requires additional software for image editing and stitching
- A more time-consuming and technically demanding workflow
- More kit to carry in the field
Top tips for using a digital SLR or mirrorless camera
- Photos should be taken in fully manual mode to avoid variations in exposure, white balance, and focus as you rotate the camera.
- Take photos in RAW format, which will provide you with maximum editing flexibility afterwards.
Equipment for 360° video
GoPro Max or Insta360 OneX2 or Insta360 Pro 2
We discuss elsewhere the pros and cons of using 360° video in virtual field trips. It is probably most effective where things are happing all around the camera. Otherwise, a combination of a standard (non-360) video embedded in a panosphere may be a better option.
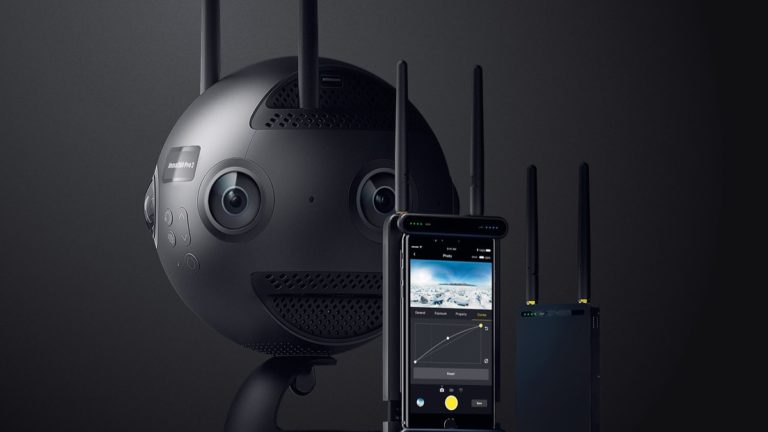
If you want to purchase kit for capturing 360° video in the field, you have a choice between consumer-grade all-in-one cameras (e.g., Insta360 OneX2, GoPro Max) or a higher-end solution, such as the Insta360 Pro 2. Other devices are available.
The smaller, consumer-grade all-in-one cameras produce reasonable video that allows the viewer to look all around. However, the resolution and image quality is underwhelming on anything other than small screens (phones, tablets, and small laptops).
The Insta360 Pro 2 provides both higher resolution and better image quality, although at a price (around £5K at the time of writing).
It is also a somewhat larger and heavier bit of kit, which is something to think about if you intend hauling it up a mountain. It is also more technically demanding to use.
Other equipment
Smartphone and/or an action camera (e.g., GoPro Hero10)
If you want to supplement your panospheres with standard photos and videos, a good smartphone or GoPro Hero camera (or similar) will be useful.
There are plenty of online reviews to guide you in your purchasing decision, which is beyond the remit of the current project.
For capturing videos, however, a good action camera is a relatively lightweight and robust solution. All the video clips in the virtual field trips provided through this project were taken using a GoPro Hero10.
Similar results could have been obtained using a good smartphone camera, although we opted not to use our own device for this purpose. The advantage of using a smartphone is that the screen is bigger, so it is easier to frame the shot.
For our still photos, we used a Fuji XT3 with a zoom lens. The Fuji XT3 is very light and is capable of producing great photos that require minimal post-processing (unlike our Canon 5DSR!). The use of a zoom lens provides close-ups that would not otherwise be possible through the panospheres alone.


This work is licensed under a Creative Commons Attribution-NonCommercial-ShareAlike 4.0 International License.